
Magic Keyboard Stabilizer—Installation Guide
Four steps to a rock-solid fit.
1 Prepare your workspace
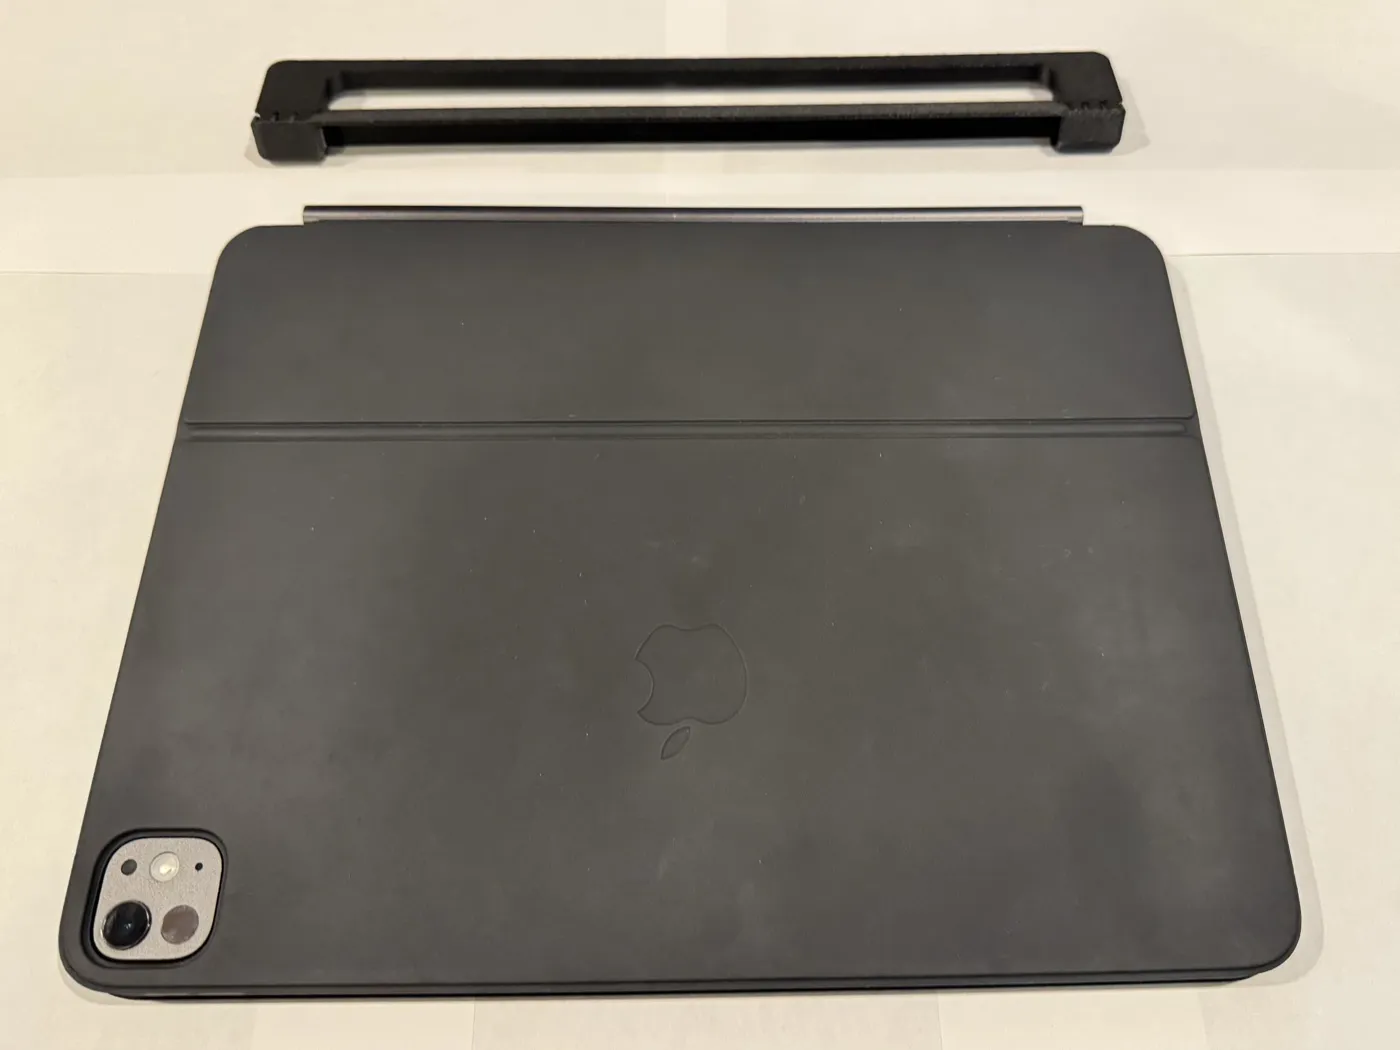
Find a flat desk surface large enough for the iPad, Magic Keyboard, and stabilizer. Remove the stabilizer from its tan placeholder; the placeholder can be discarded.
- Place the iPad in the keyboard on the desk with the camera facing you, in the left corner closest to you.
- Set the stabilizer next to the iPad in its closed position (it forms an L from the side), gray surface facing down and away from the iPad.
2 Attach the right portion
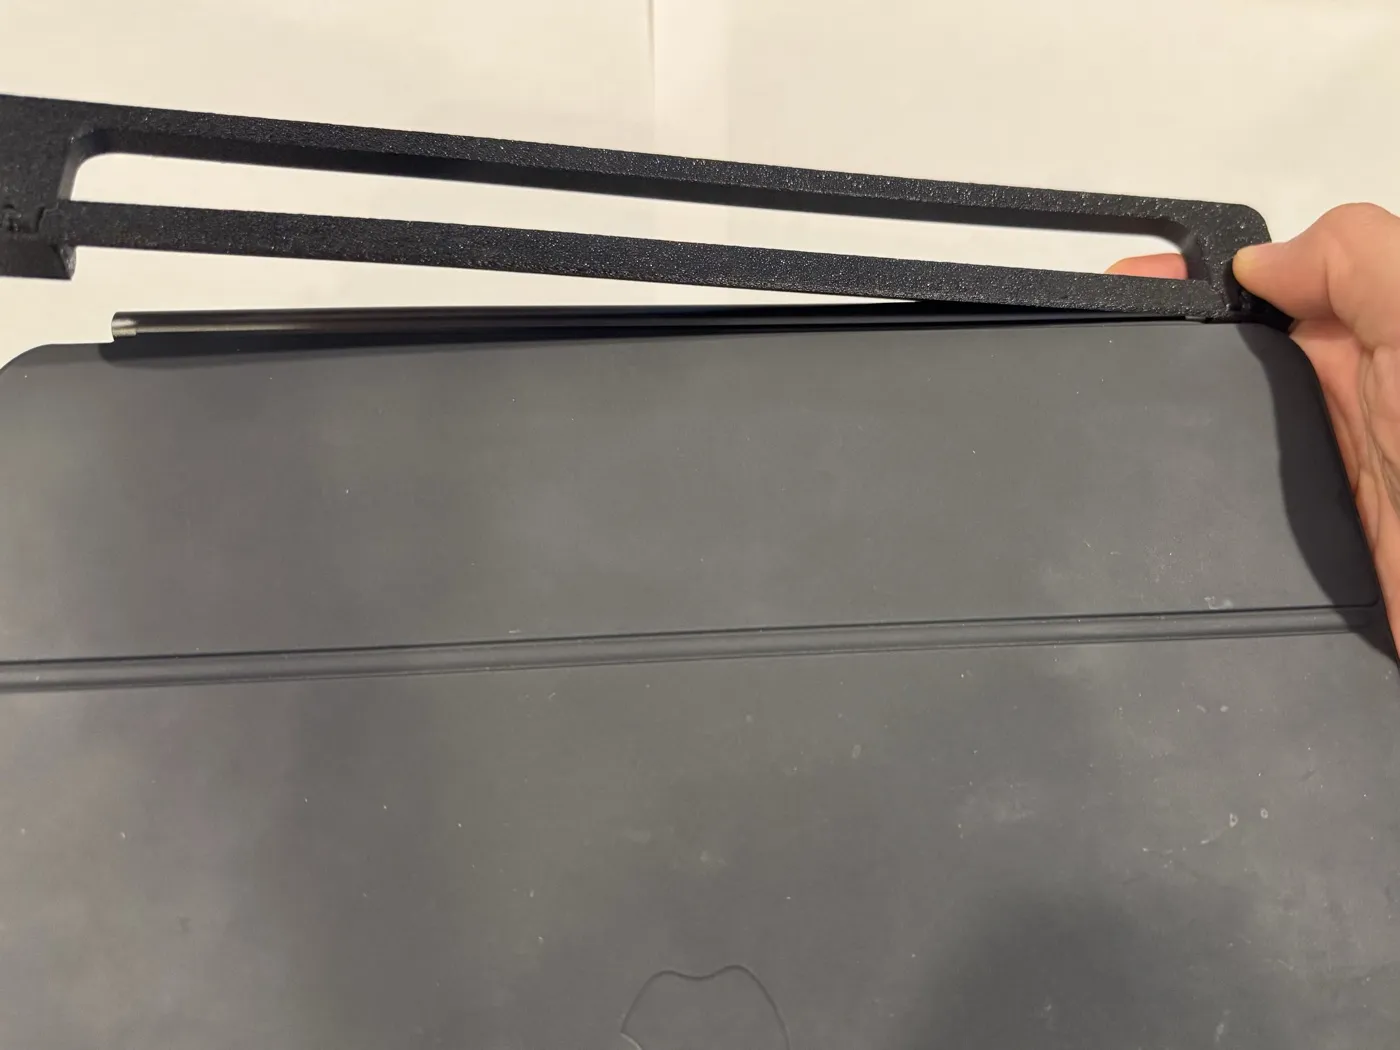
Align the right part of the stabilizer with the metal frame on the Magic Keyboard's right side and place the metal inside the stabilizer. Press down and to the left until the metal is fully surrounded by the stabilizer's small lips.
3 Attach the left portion
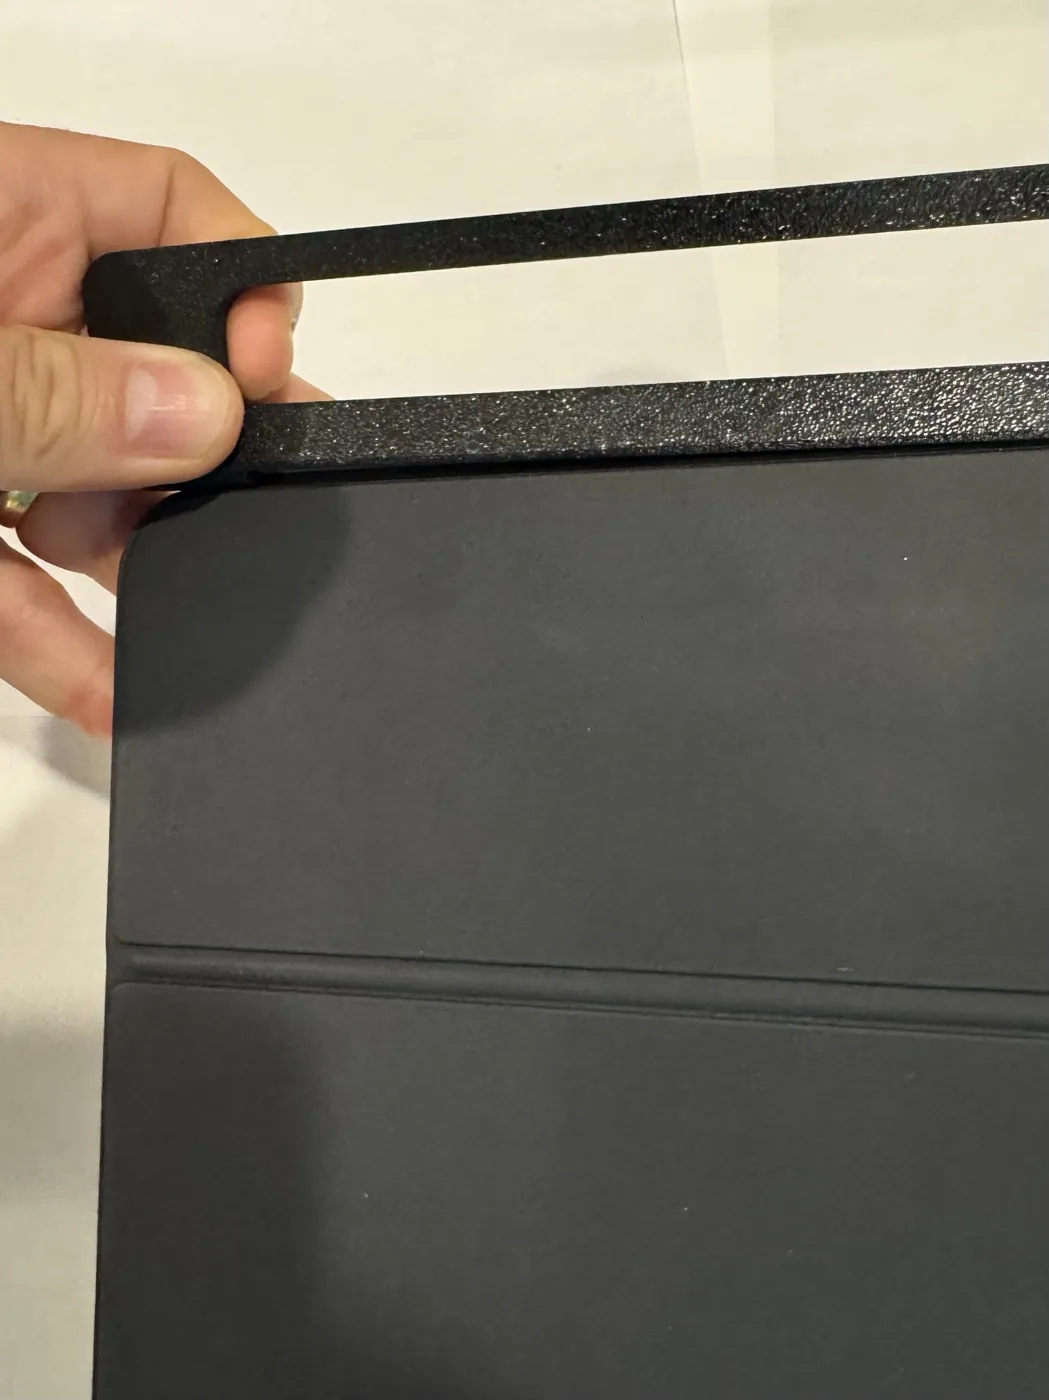
Slide the left stabilizer piece from top to bottom onto the Magic Keyboard. If needed, gently pull the stabilizer toward the left side while pushing down for a snug fit. You can also slide your thumb across the middle portion—from the right piece toward the left, pressing down—to get the left side to line up.
4 Verify the fit
Turn the iPad around so the camera faces down and the stabilizer is closest to you. Check that the stabilizer sits slightly taller than the metal frame of the Magic Keyboard spine at both the left and right ends.
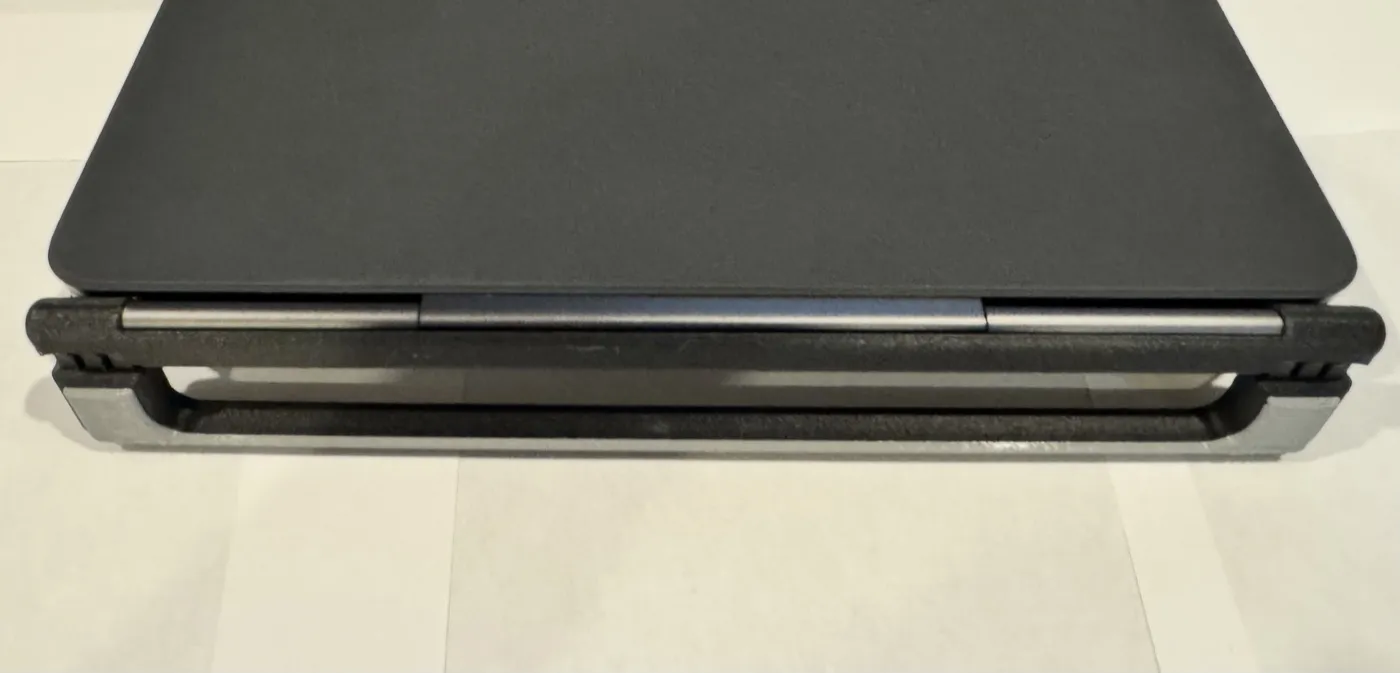
Once fully seated, open the iPad to your preferred angle and enjoy the stability!
One care tip: the stabilizer is happiest living on your keyboard full-time. Removing and reinstalling it often—or lifting the whole setup by the stabilizer—wears the tips and shortens its life.
Stuck, or does something not look right? Don't force it—email contact@tutashllc.com (a photo of what you're seeing helps) and we'll get you sorted.